MASTER BATHROOM

I officially understand the meaning of "good things take time." This bathroom took months from start to finish but the end result was worth all the time and money spent to create it and it might be my new favorite space in the house.
I went back and forth a lot with this room design wise and my vision for it was pretty unclear. Sometimes I think I fall too deep into the Pinterest world and feel my heart tugging in several different directions. I sampled dark green paints, black paints; played with the idea of doing it entirely shiplap but painted a fun color; all without feeling settled or content with any of them.
Then I saw the wallpaper.
As soon as I laid eyes on it I knew I needed it somewhere in our home, and once I had copy and pasted the sample of it onto our mood board I knew exactly what I wanted to do.
But before I get to ahead of myself, let's start off with our usual.
Disclosure: Some of the links in this post are affiliate links and if you go through them to make a purchase I will earn a commission. Keep in mind that I link these companies and their products only when I genuinely love the quality and use them in my own home, and not because of the commission I receive from your purchases. We appreciate every single effort from our following to support this platform and help us continue to create, inspire and grow.
BEFORE


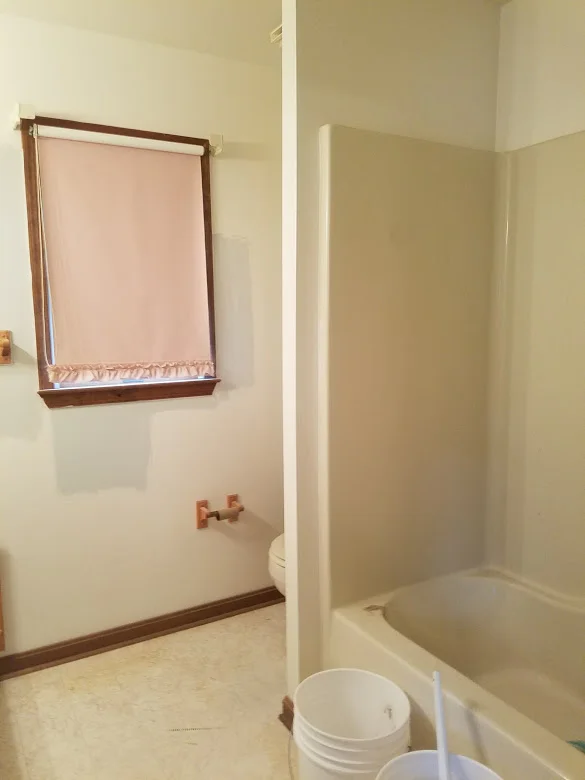


We completely demolished this room down to a blank slate. The closet was so cramped and lacked function and it's not a huge space to begin with so I knew I wanted the wall between the tub and the toilet gone for extra natural light and sight lines. Bobby and I had a first with this bathroom, we actually hired some out. We had never tackled tilling a shower before and wanted to watch it being done correctly before we jumped in. Leaking tiles are not an easy or fun thing to fix, so we shadowed a contractor for this. Needless to say, we won't be doing it again (it turned out fine, it's just not our thing.. plus once I was told my design choices were ugly I was pretty much over it). Anyway -- the rest of the room is entirely DIY.

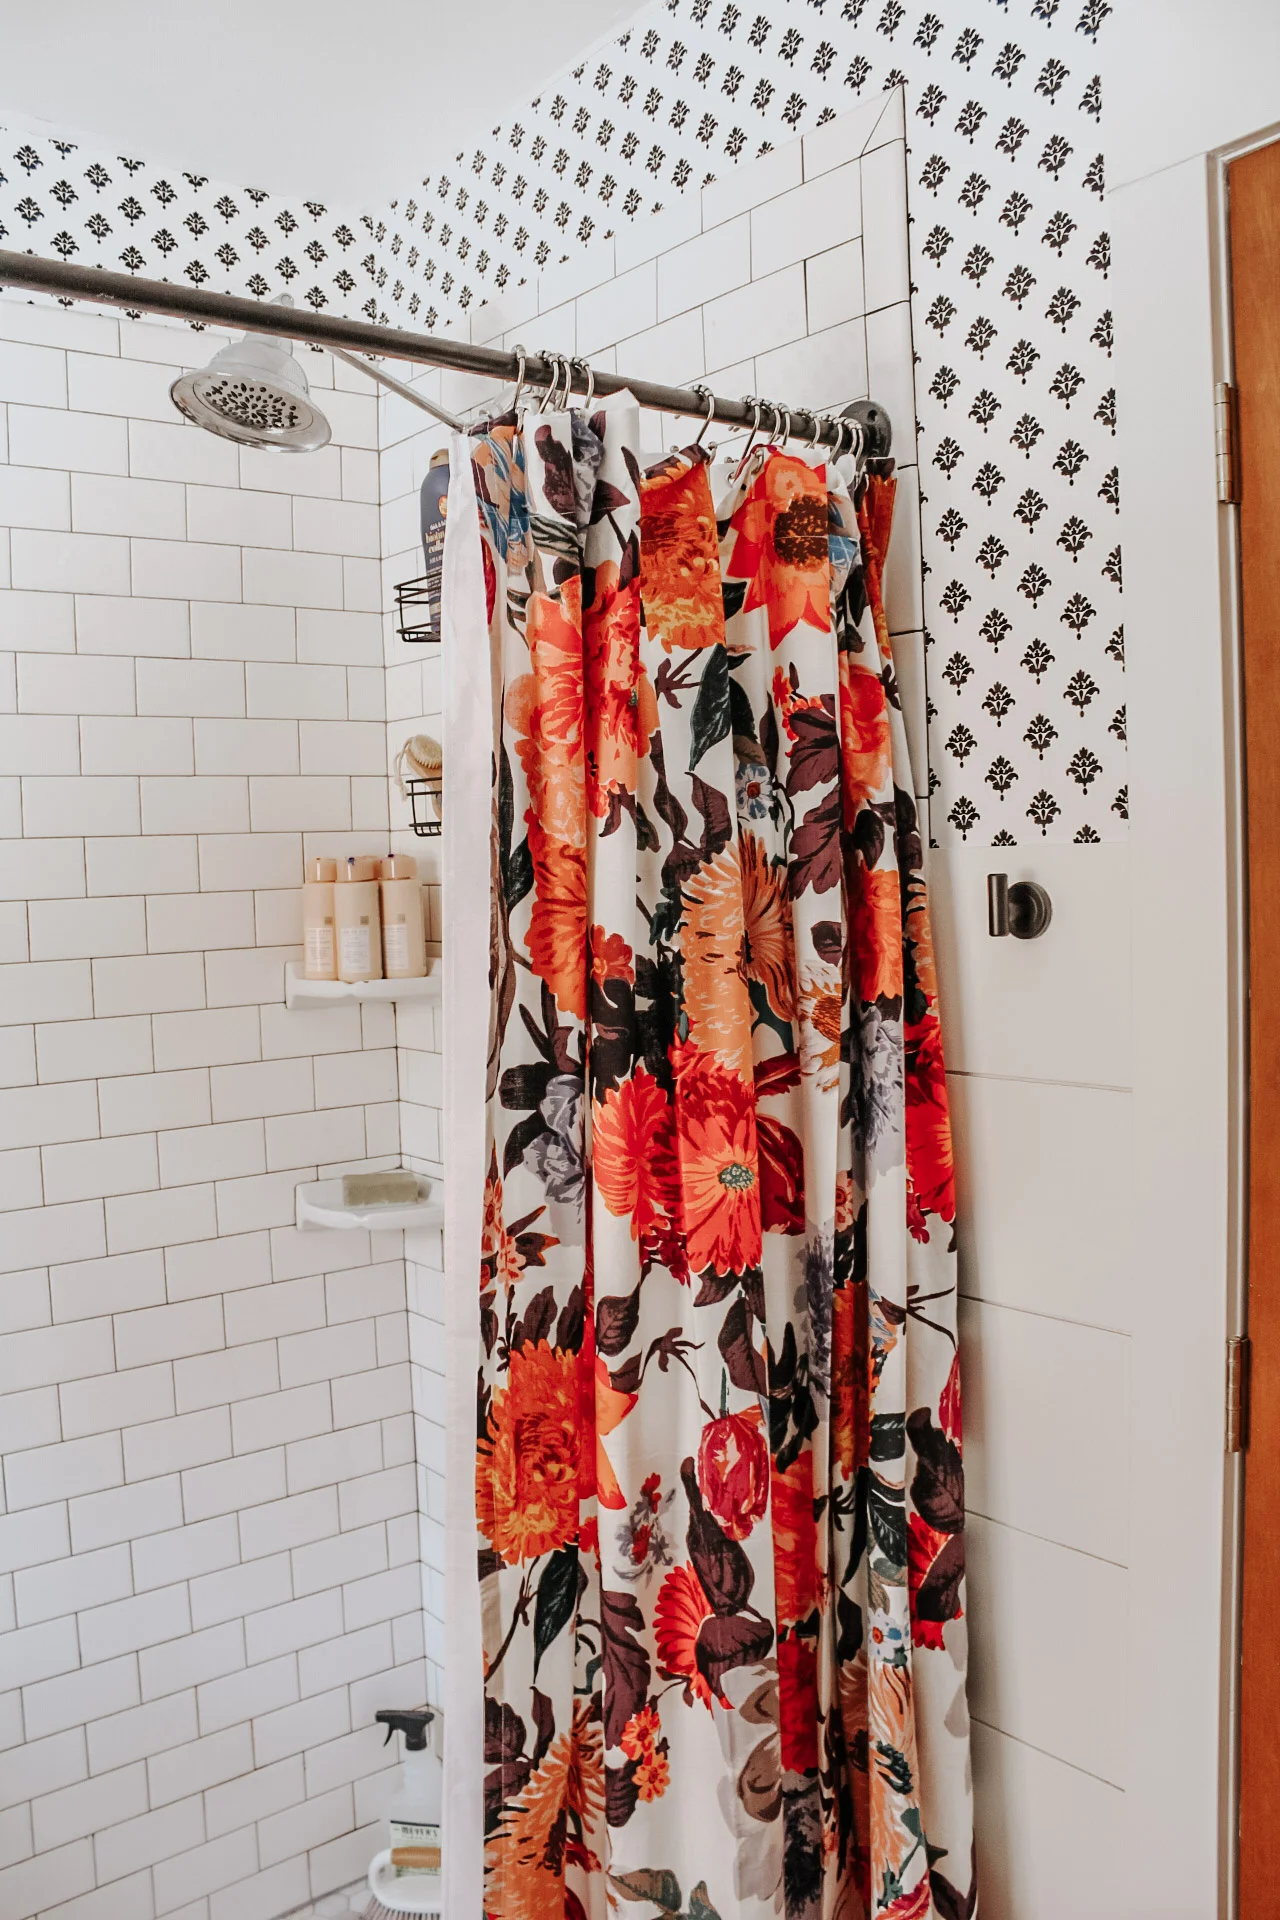
We went with Subway tile and Charcoal Grout for our shower walls mimicking the design in the kitchen; and for the shower floor went with a hexagon shape with some texture and grip. We wanted our floor tile to look as cohesive as possible to the rest of our flooring, and we were able to find almost a perfect match wood look tile at Home Depot.
We originally planned on installing 2 glass walls with a door in the shower, but after hearing that the cost would be more than what we payed for the tile work to be done we decided it wasn't a necessity. We got a little creative and decided to go an industrial route.


PLUMBING PIPE SHOWER ROD

We decided to take a walk down the plumbing isle of Lowe’s and I'm shocked at how in love I am with this feature.
We started by measuring the length and width of our shower which was 3x5 while also accounting for the length of each fitting and flange.
We used 1/2 inch diameter black iron pipe from Lowe’s - then to figure out height we measured the height of the shower curtains + the height of average hangers to hang directly at the lip of the shower without dragging the ground.
Be sure to clean it really good with a degreaser - because in order to cut the pipes to length (Lowe’s does this for you) they have to use a lot of oil while cutting and threading the pipes. Also when measuring the pipes you need to account for the length of the fittings as well as the pipe.
We put a flange on each tile wall with a masonry drill bit and one to our ceiling with drywall anchors and screws.
The pipe comes black but we spray painted it with a matte finish for a nice cohesive finished look.
*It needs to be VERY clean for the spray paint to stick.


WALLPAPER
This wallpaper might be my favorite thing in our home. I got it on sale at Anthropologie and I am definitely not done buying from them. The quality is great, it shipped quickly and was an easy installation. This particular one came pre-applied so installation was a little simpler.
If your not using pre-applied kind, my only advice would to be make sure you get the glue on the entire piece of the paper and take your time while installing each piece. It doesn’t dry as fast as you think it does. Keep calm and get it right! Also a fresh razor blade makes a big difference - a dull blade will drag the paper and mess it up.
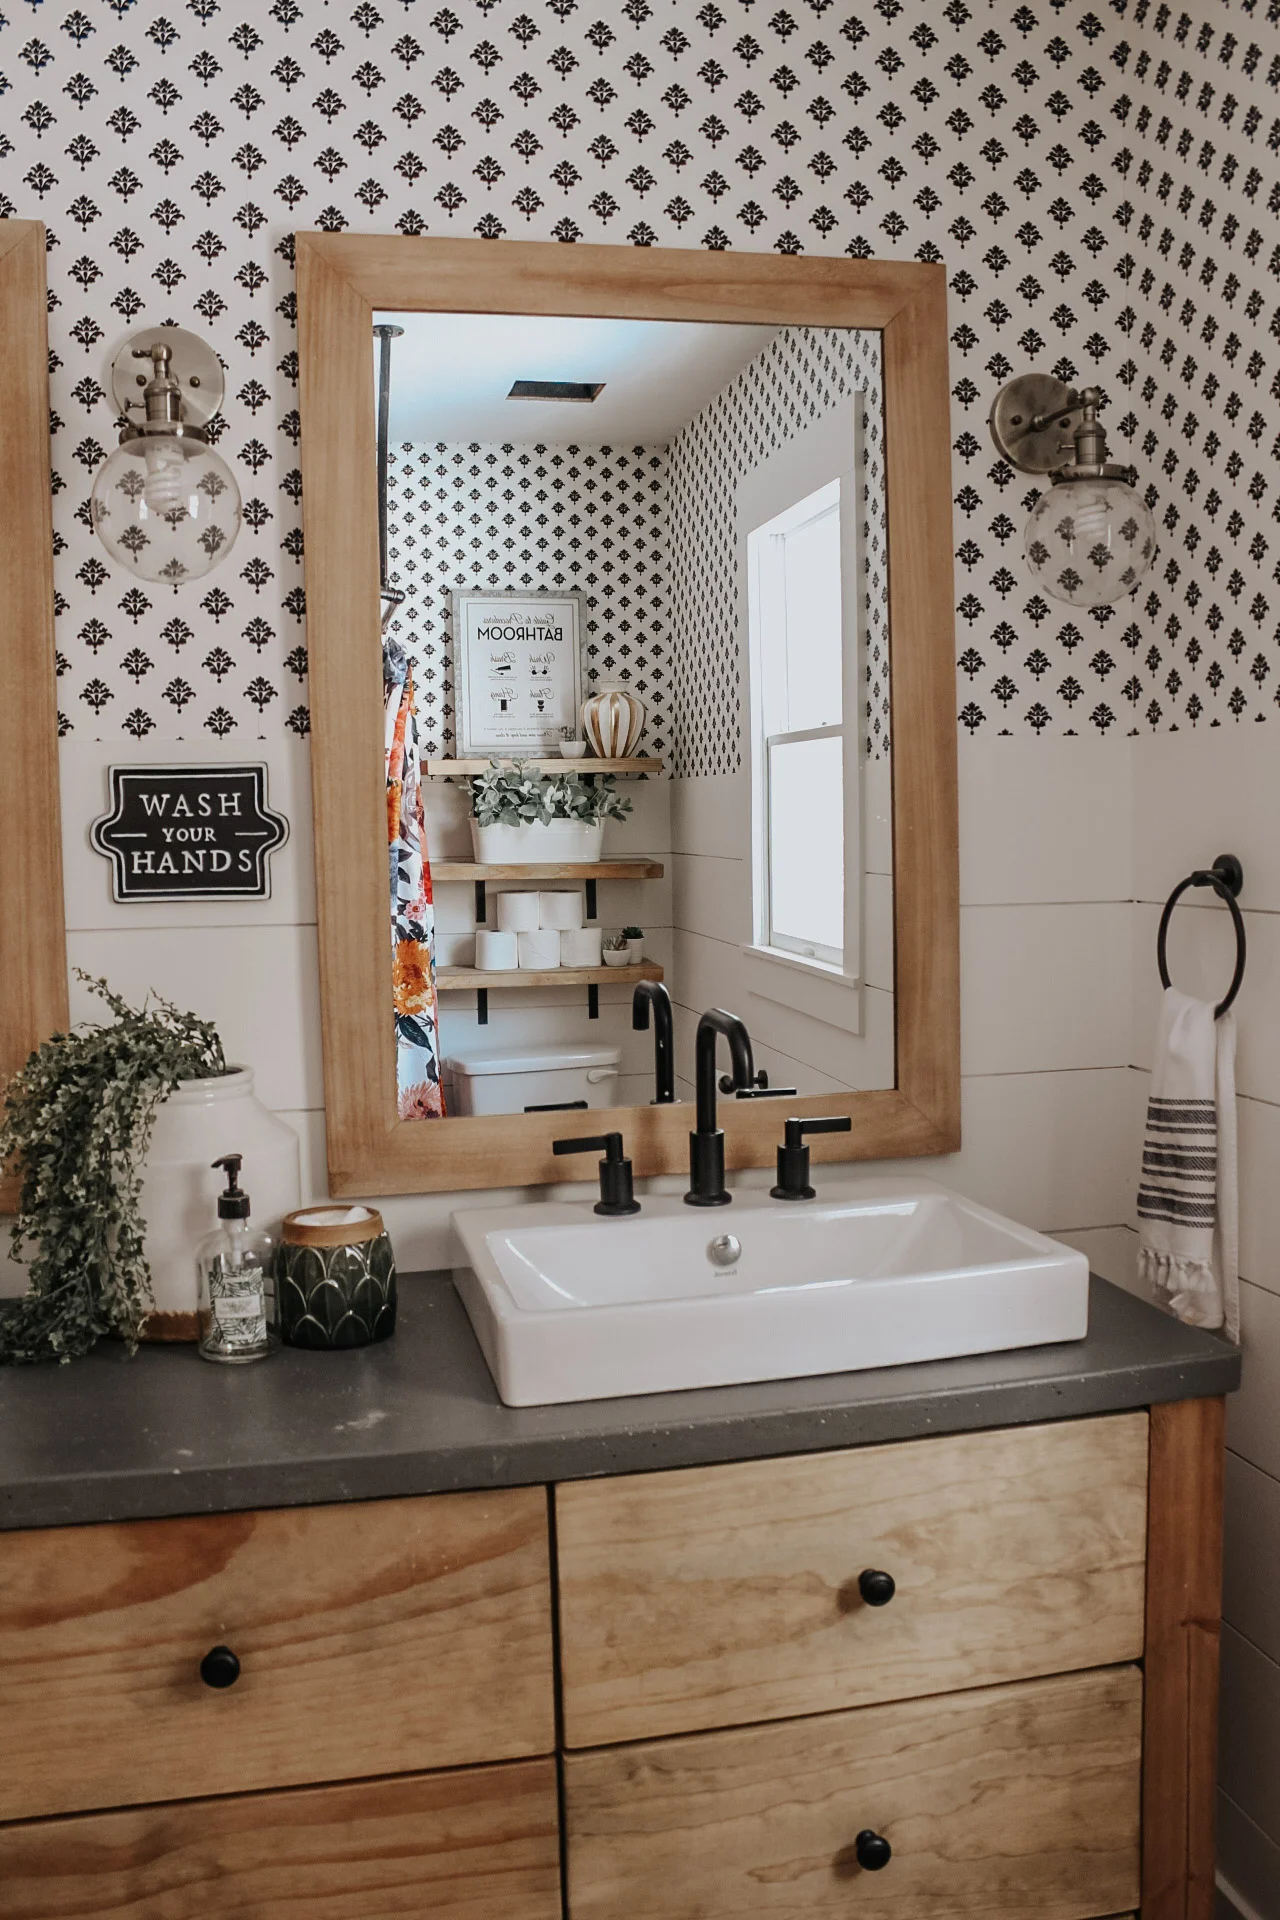
SHIPLAP

We went with 8 inch thick “shiplap” on the bottom half, and by shiplap I mean 3/16 Plywood from Lowe’s. They will cut the planks for you if you ask (this saves tons of time) and we use two pennies taped together as our gap in between pieces. We always start from the top and move downward because you will end up having a piece that’s cut off, and I prefer those at the bottom. Benjamin Moore Cloud White was the closest white we could match to the wallpaper and I think it turned out pretty cohesive.

HARDWARE
Amazon y'all. We got it ALL off Amazon. These vintage looking antique bronze sconces caught my eye immediately and despite doing everything else in matte black, I thought the contrast was needed and that it would compliment the vintage feel of the wallpaper perfectly. I'm completely in love with them and they were a STEAL at $32 a piece.

I love the clean modern black matte faucets and the "matching" towel hooks, rings and a toilet paper holder. We also went with our signature DIY Shelving for behind the toilet to break up all the black and white on this wall.


POTTERY BARN HACK


Last but not least, the vanity. I had my heart set on this $3300 vanity from Pottery Barn. It was exactly what I pictured in the space but I couldn't justify the price. Bob and I got the pad of paper out and started planning... what it would cost, how much time it would take, was the cost x time worth it, could we even pull this off.. Being totally honest, I didn't think it was going to turn out in our favor. We had never tackled a build this "complex" before and it was a little intimidating, especially the concrete counter top part.
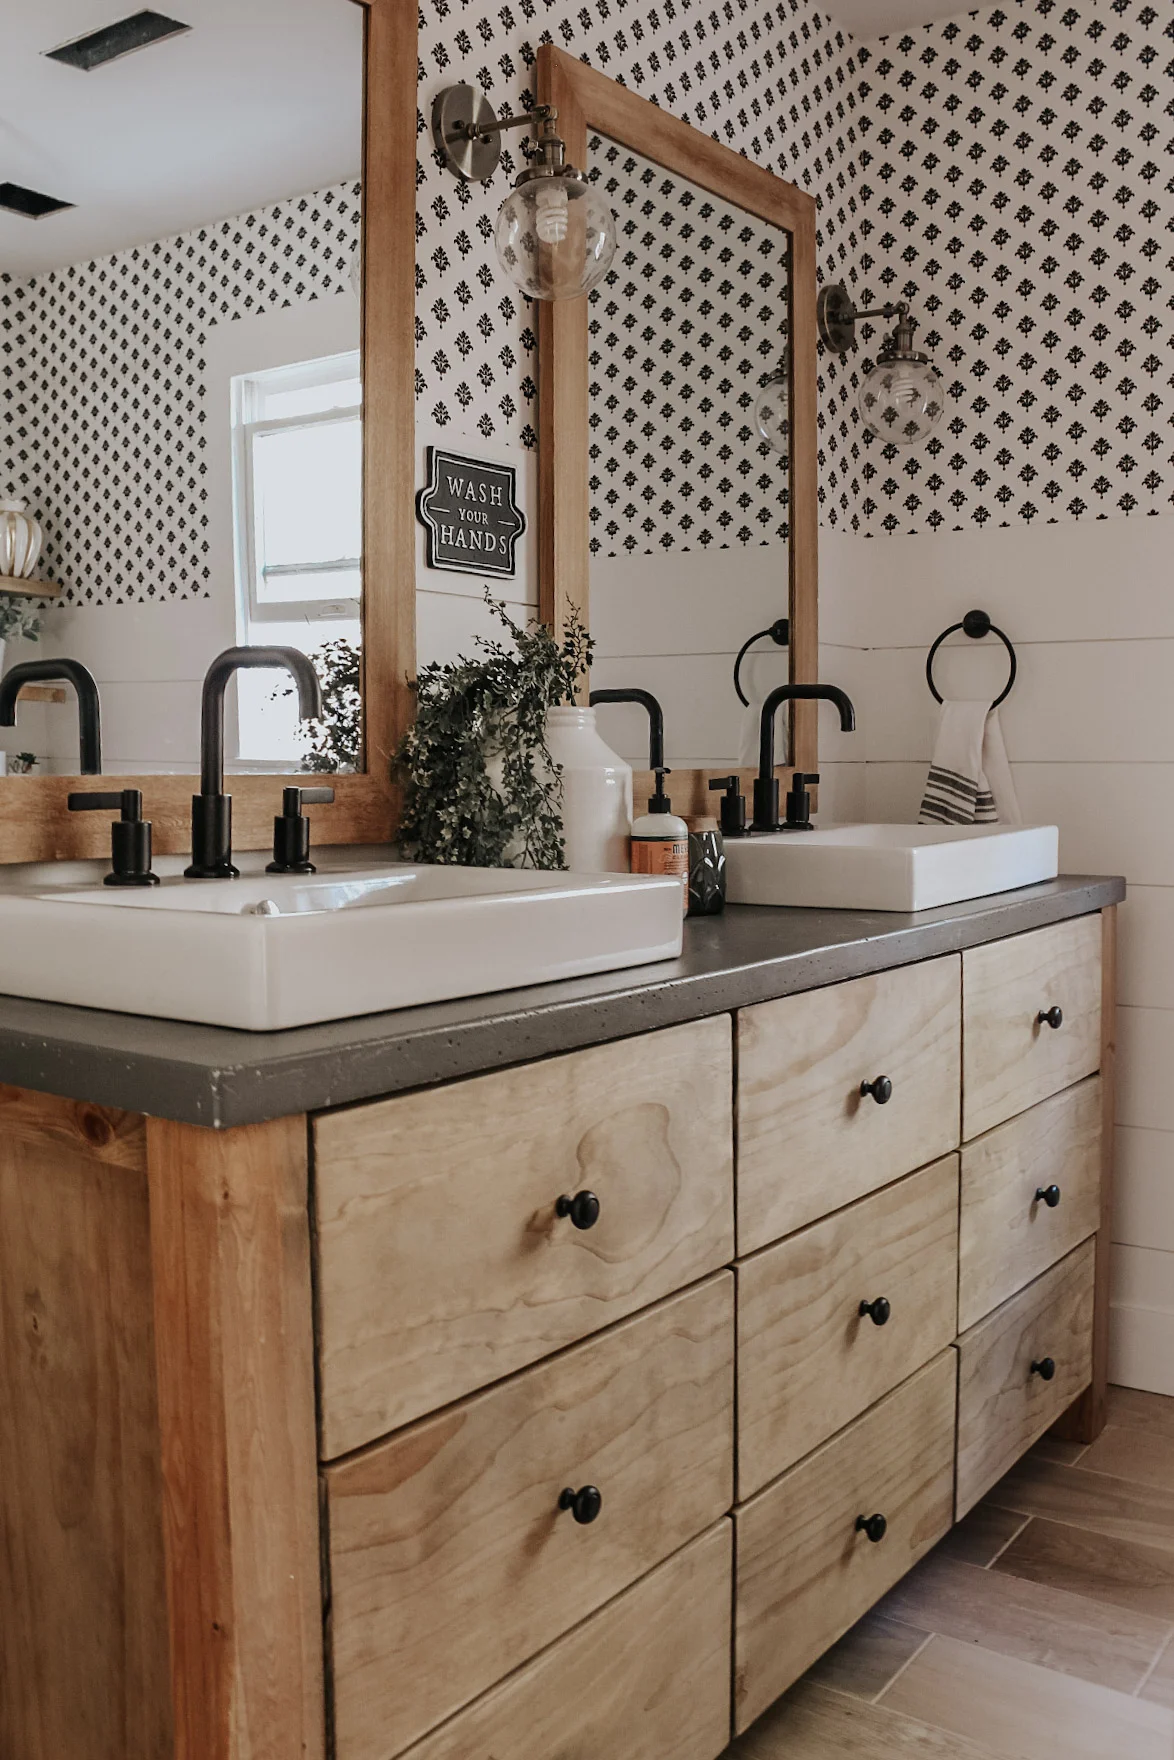
However, Bob proved me wrong. This thing is a BEAUTY and a fully functioning one at that.
Pottery Barn Vanity Tuturial HERE
This is easily one of my favorite transformations we’ve done to date. We’re currently brainstorming design ideas for our other bathroom and I’m not quite sure how I’m going to top this one. I can almost guarantee there will be wallpaper though!
If you stuck with us til the end of this, thank you!! As always - if I left out any details or there are unanswered questions don’t hesitate to reach out.
I’ve also provided links to sources at the bottom.


LINKS TO PRODUCTS:
Disclosure: Some of the links in this post are affiliate links and if you go through them to make a purchase I will earn a commission. Keep in mind that I link these companies and their products only when I genuinely love the quality and use them in my own home, and not because of the commission I receive from your purchases. We appreciate every single effort from our following to support this platform and help us continue to create, inspire and grow as a company.
SINKS: linked here


